Sunday, December 4, 2011

Chocolate Chip Cookie Dough Bites


Not only did my cousin Gina and I host a very successful cupcake table at a local holiday fair this weekend, but I also found a new, super-easy, treat to make...and ladies, you're all going to love it. I don't know how something this simple and delicious is legal, but somehow this wonder slipped through the legal cracks for lethal deliciousness:

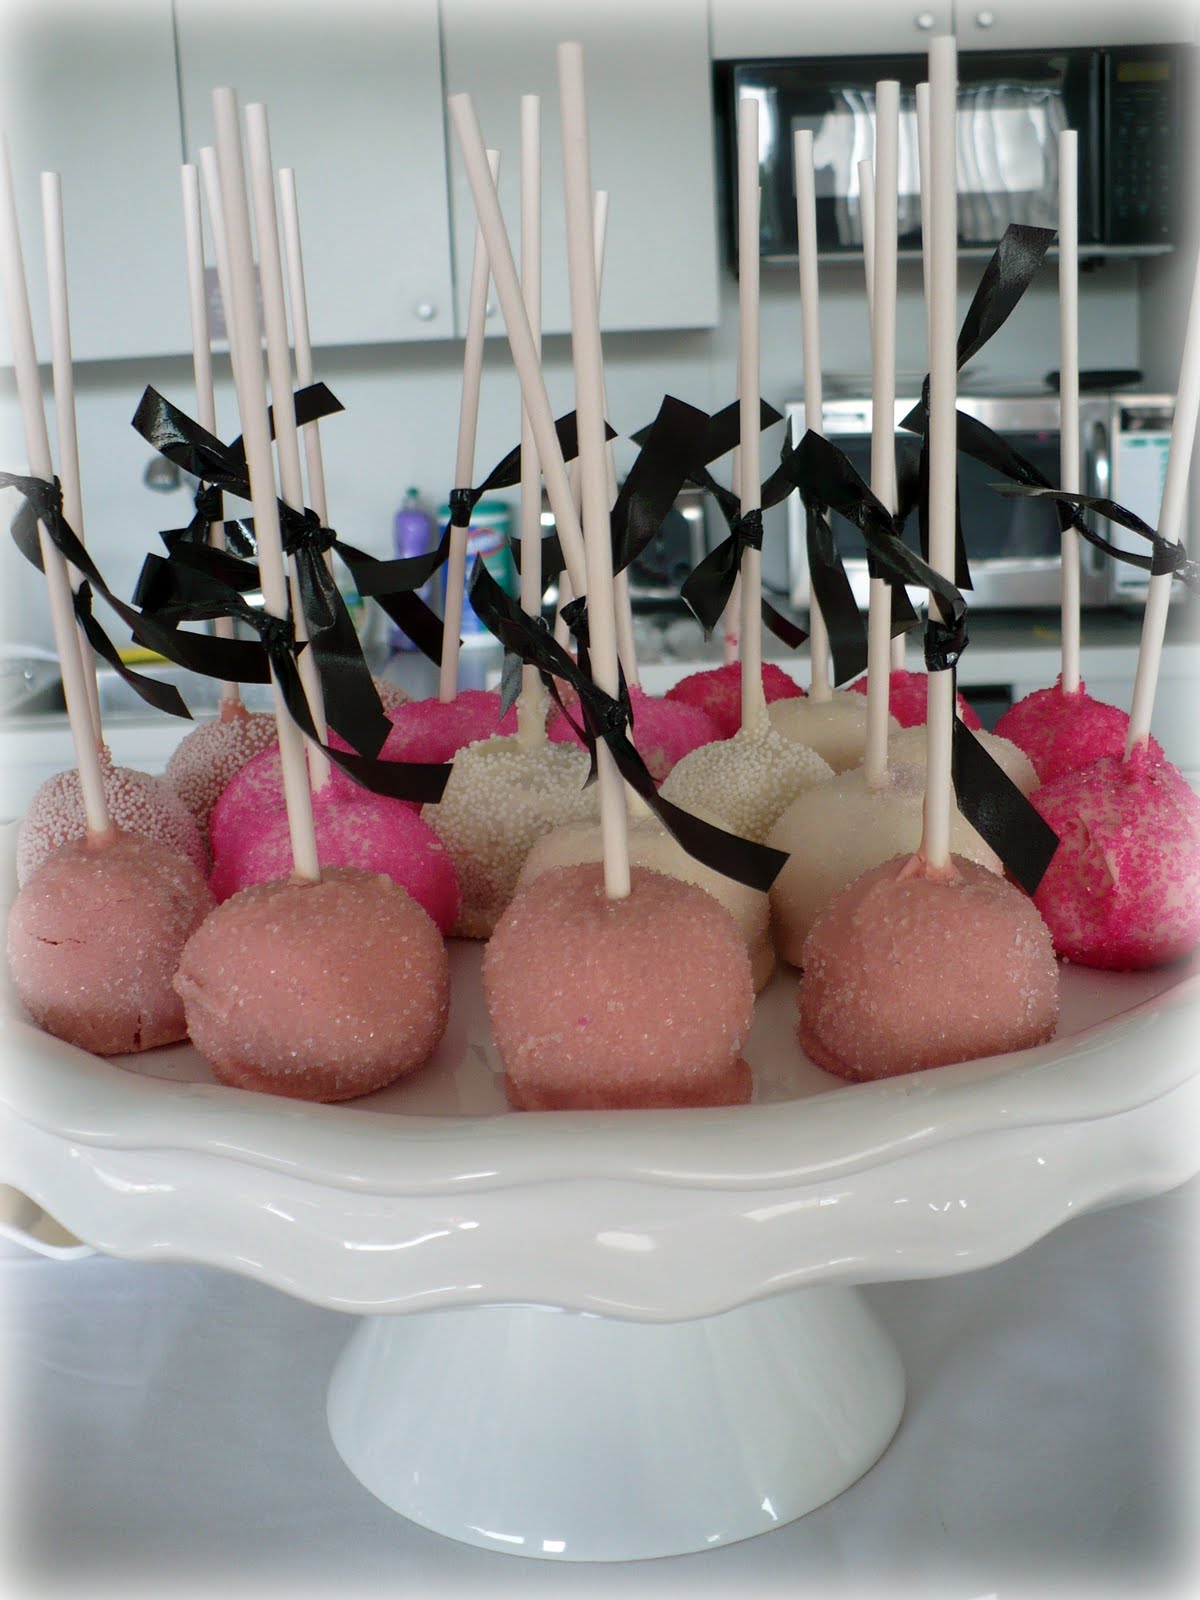
Chocolate. Chip. Cookie. Dough. Bites.

Yes, that's right - it's finally okay to eat raw cookie dough! And even better....eat it covered in chocolate!

I saw a recipe for this on my newest obsession (pinterest) and then adapted it for my own purposes. 

These taste amazing at room temperature, refrigerated or frozen.  I'm nominating this as the Best Holiday Party Dessert of 2012.

Super easy! Here is the recipe:

Chocolate Chip Cookie Dough Bites

1 C. butter, softened
1 1/2 C. brown sugar
2 tsp. vanilla extract
1 tbsp. water
2 C. flour
1/8 tsp. salt
3/4 C. chocolate chips
Additional chocolate for melting

Using an electric mixer, beat together butter and brown sugar until smooth. Add in salt.  Add in vanilla. Add in flour a 1/2 cup at a time, mixing well in between each addition.  Add in water and mix well. Fold chocolate chips in until they are evenly dispersed in the dough.

Roll dough into 1" balls and place on a cookie sheet lined with wax paper.  Place in the freezer for ten minutes until firm. 

Microwave chocolate in the microwave at 30 second intervals, stirring in between, until chocolate is smooth.  Using a spoon, roll cookie dough balls in the chocolate and set on wax paper. When chocolate hardens, store in a plastic zip loc bag and store in the freezer.

Makes about 3 dozen bites.

Want to see the pictures of our cupcake table? Take a look - after the jump.

Sunday, November 27, 2011

Back Bay Boston Chocolate Tour: A Perfectly Delicious Use of a Saturday

Can you think of a better way to spend a Saturday afternoon than strolling around Boston sampling gourmet chocolates with other fellow-chocolate lovers? I can't either....and for me, this Saturday was the day my dream turned into a sweet reality.

After picking up heavily discounted tickets to take a Boston Chocolate Tour (thank you, Rue La La), I treated my mom to their Back Bay tour this weekend. The weather was gorgeous and the agenda (nine stops all within a mile boasting the best of the best in espresso, truffles, skin care and cookies) was more than appealing.

The tour was informative, fun and filling - we were stuffed with cocoa by the end of our journey! Our tour guide and other tour members were wonderful, too. What a special day to share with my Mother - the woman who passed down her chocoholic genetics unto me.

What an amazing holiday gift this would make for someone you really care about.  What better gift is there than a chocolate-filled day of memories? Gift certificates to the Boston Chocolate Tours are available on their website: Boston Chocolate Tours

A recap of our travels is featured after the break:

Sunday, November 20, 2011

Ultimate Indulgence: Chocolate Almond Buttercream Frosting


I am in love with chocolate - that's no secret.  But for me, the perfect marriage of chocolate with chocolate comes in the form of a cupcake adorned with a generous dollop of rich, fudge-like chocolate almond frosting.

Now, for those of you who claim to be almond haters - listen up. You don't  know what you're missing! Especially when pairing the sweet yet strong flavor of almond with all the glory that is cocoa. The chocolate brings out the best in the almond, the almond brings out the rockstar in the chocolate.

This chocolate almond buttercream frosting is fast to make and impossible to resist.   I literally make it at least twice a month!  Keep this recipe on file...better yet, type it up in size 20 font and stick it smack dab on the front of your fridge. When your chocolate craving strikes, you'll need this recipe handy!

Chocolate Almond Buttercream Frosting

1 C. (2 sticks) butter, softened
3 1/2 C. confectionery sugar
1/2 C. cocoa powder
1/2 tsp. salt
1 1/4 tsp. almond extract
3 tbsp. milk (whole milk is best in baked goods & frosting)

With an electric mixer, beat butter until soft and creamy.  Add in confectionery sugar 1/2 cup at a time (mixing at a slow speed to avoid having your kitchen look like the Swiss Alps). Add in 3 tbsp. milk. Mix well.

Add in cocoa. Mix well.  Add in salt & almond extract. Mix well.

Frosting will be slightly thick and fudge like, but should be easy to spread.  If frosting is too thick, add a 1/2 tsp. of milk in at a time until desired consistency is reached.

Voila. Chocolate lovers, rejoice.

For a fun look, top your frosted cupcakes with bright sprinkles.


For a sophisticated look, top your frosted cupcakes with slivered almonds.

Sunday, November 13, 2011

Spice Cake Cupcakes with Cinnamon Cream Cheese Frosting


Fall is here! Although, in Massachusetts you wouldn't know it with temperatures reaching in to the sixties over the past few days, mid-November has never felt so good.

Although the thermometer is putting my mind in Labor-Day mode, the calendar is telling me it's time to buckle down and embrace some fall flavors.

Spice cake embodies the season's flavors at their best.  Hearty, sensual, comforting ginger, cinnamon, nutmeg and brown sugar come together and put your taste buds in a daze. The cinnamon cream cheese frosting will intensify your daze to the point of a utopian, autumnal coma.


Spice Cake Cupcakes with Cinnamon Cream Cheese Frosting

For the cakes:
1/2 C. butter
1 1/2 C. brown sugar
3 eggs
1 tsp. vanilla extract
1 3/4 C. flour
1/2 tsp. nutmeg
1/2 tsp. ginger
1 tsp. cinnamon
1 tsp. baking soda
1/2 tsp. salt
1 cup (8 oz) sour cream

For the frosting:
8 oz. cream cheese, softened
1/2 C. butter
3 3/4 C. confectionery sugar
1/2 tsp. vanilla extract
1/2 tsp. cinnamon


Preheat oven to 350 degrees.

Using an electric  mixer, cream together butter and brown sugar in a large bowl. Add in eggs one at a time & mix well. Add vanilla. Mix all dry ingredients (flour, nutmeg, ginger, cinnamon, baking soda & salt) in a separate bowl.  Slowly add half the dry ingredients to the batter. Mix well. Add in sour cream. Mix well. Add in the rest of the dry mix to the batter. Mix well.

Line two cupcake trays (standard size) with paper liners). Fill each cup only about 1/2 way. This batter grows a lot when baking! Bake for 16 minutes or until a toothpick inserted in the center of the cake comes out clean.  Allow to cool completely before frosting.

Beat cream cheese & butter with an electric mixer until smooth. Add confectionery sugar a 1/2 cup at a time until mixed well. Add vanilla and cinnamon. Beat until frosting is fluffy. Frost cakes with a piping bag or offset spatula

For an extra touch - make decorative "leaves" by rolling out soft caramel candies and cutting them out with a small leaf cookie cutter. Use the blade of a knife to add details to the leaves.

Tuesday, October 18, 2011

Sugar Cookies

Now is the time for layers - sweaters & other baggy garments that allow me to eat lots of cookies without feeling guilty because guess why - you can't see me! It's chipmunk season, people! Time to start indulging! Fat = warmth. Bears know whats up! Leave the guilt in your rear-view and don't swing around to pick it up until it's January and your need to feel accomplished by having "resolutions" starts to nag at you.


Sugar cookies are pure fall perfection. They are sweet, savory, salty, pretty, and basic...all of the familiar things you love about the fall.  And I'm warning you now - don't taste the batter because by the end of it you'll be cursing me for claiming that this recipe makes three dozen, when unknowingly you ate about a half dozen yourself.

Sugar Cookies
Adapted from Savory Sweet Life's recipe for Drop Cracked Sugar Cookies

1 1/4 C. sugar
1 C. butter
3 egg yolks
1 1/3 tsp. almond extract
2 1/2 C. flour
1 tsp. baking soda
1/2 tsp. cream of tartar
1/4 tsp. salt
Colored Sugar Crystals


Preheat oven to 350 degrees.

Using an electric mixer, beat sugar & butter until creamy.  Next, add in the egg yolks, one yolk at a time.  Add in almond extract.

Next add in baking soda, cream of tartar, salt. Mix. Now add flour in a 1/2 C. at a time until all flour is mixed in and a dough is formed.

Roll (or scoop) dough into 3/4" balls. Roll 3/4 of the cookie in the granulated sugar of your choice.  Place the bottom of the cookie (1/4 not covered in sugar) on a silpat on a cookie sheet (or a greased cookie sheet. If you don't have silpat, parchment paper works best). Leave about 2" between each dough ball as cookies will grow in the oven.  Bake for 12-14 minutes or until bottoms are just golden.  If cookies come out dome shaped, pat down top of cookies with a spatula or pie server to flatten.

Yields about three dozen cookies.

Sunday, October 9, 2011

Peanut Butter Balls


As I prepared to glue myself to a sofa from the hours of 8-10 pm to shamelessly indulge in part one of the televised Kim Kardashian wedding event, I felt the need for something sweet...and incredibly quick to make.  It was already 7 pm and I needed time to make something, decompress, get comfortable and flick to E! within sixty minutes.

I  knew that even going near the oven would result in minute-hogging cleaning and too much time spent preheating, baking, cooling and all the rest of it. It had to be *gasp* no-bake or it was going to be nothing at all.

Then I remembered this wonderful little twenty minute dessert....peanut butter balls. And almost as quickly as I decided on making them, they were done.  Here's the recipe. They are quick, easy, delicious and although simple, quite fancy looking.


Peanut Butter Balls

3 tsp. room temperature butter
1/2 C. Peanut Butter
1 1/4 C. Confectioners Sugar
3 1/2 tsp. milk

1 C. Chocolate chips or chocolate melting wafers

In a bowl, mix butter & peanut butter with an electric mixer. Slowly add in confectioners sugar - about a half cup at a time until all is mixed well. Add in milk to moisten mixture and mix thoroughly until dough forms.

Roll mixture into 1" balls and place on a piece of wax paper on a cookie sheet. Place in the freezer for ten minutes.


Pour chocolate chips (or chocolate melting wafers) into a microwave safe bowl  and microwave for 30 seconds. Stir. Continue to melt at thirty second increments until chocolate is smooth and completely melted.

Dip peanut butter balls into chocolate and cover completely with spoon. Place on a piece of wax paper to dry. Add sprinkles right away if you desire.


Store in an airtight container either on the counter or in the fridge.  Makes about 1.5 dozen peanut butter balls.

Enjoy...and Congrats Kim & Kris!

Saturday, October 1, 2011

Apple Bourdelot en Croute


Nothing gets you in the mood for fall like the fresh, crisp taste of an apple. Whether it be Macintosh, Granny Smith or Golden Delicious, apples emulate all that is fall. They're refreshing, bright, comforting. They match the same soothing colors that are starting to pop up on the trees all around us and when you bite into them it sounds like the crunch of leaves under your favorite pair of boots.

Fall in New England is not a season known for its longevity, but luckily there is no shortage of apple-related recipes to make the warm, fuzzy feeling of the season linger on and on. 

Apple Bourdelot en Croute (which in English translates to Baked Apple in Pastry Crust) is an amazing dessert that allows everyone to have their own piece of fall...and the best part is, you don't have to share! Each apple is cored, stuffed with butter, brown sugar, dried cranberries and maple syrup resulting in the apple pie equivalent of a molten lava cake. And then to top it all off, it gets wrapped up in its own individual pie crust and decorated to resemble the very fruit that the dessert celebrates.

I learned how to make this last year in an Adult Ed Decadent Desserts class and I was enamored. How delicious. How fancy. How....simple. 

Trying to impress someone this fall? Try this one out.....Oh heck, make it for yourself. It's delicious & you'll thank me later.

The quality of the photos aren't that great. Obviously, I was just eager to eat this thing.

Recipe after the break....

Sunday, September 25, 2011

For a Great Cause


The summer before my senior year of high school, my mother was diagnosed with breast cancer. I remember feeling terrified and then completely numb. No one else in my family had had cancer and at that point, I was lucky enough to never have lost someone I was close to. I was scared that I would lose her and I felt helpless. At age seventeen, on the brink of beginning my own life, I was frozen by the thought of losing the very person who had given me life, nurtured me and taught me what it meant to be an incredible woman.

Now, over seven years later, I am so happy to say that my mother is healthy and has been cancer free for years. A diagnosis is not the end, it's the beginning of a journey for these women and for those who love them. There are many wonderful institutions, hospitals, non profits and support groups that help patients and families through this journey through the sunny days and the dark ones, too.

One such organization is the American Cancer Society. For the past six years, I have walked in the American Cancer Society's Making Strides Against Breast Cancer Walk which brings together thousands of men and women to support an incredible cause, build awareness and share their stories, support and strength. I feel so honored and grateful to have my mother there with me, walking by my side, each year.

If you know someone who has been affected by breast cancer, you know how important it is for the research toward finding a cure to continue and progress.

Please support the American Cancer Society by helping me reach my fundraising goal for this year's walk.

Click here to donate, or if you're in the Boston area, join my team. I'd love to have you!

Sunday, September 18, 2011

Moist Mocha Cake

Sunday dinners with my family have always been hearty. Raviolis, meatballs & sausages. Honey-roasted ham, mashed potatoes, roasted vegetables. Beef Stew with a hunk of french bread.

Today, after another carbo-load meal, I was craving a sweet, equally rib-sticking, sweet finale. Chocolate. Coffee. More Chocolate. I was aiming to create a Mocha Monstrosity....and create, I did.


Moist Mocha Cake 
(Adapted from Betty Crocker's Mocha Muffins Recipe )
 
2 C. Flour
2 Tbsp. Unsweetened Baking Cocoa
2 1/2 Tsp. Baking Powder
1/2 Tsp. Salt
1/3 C. Brown Sugar
1 C. Milk
1/3 C. Vegetable Oil
1 Tbsp. Instant Coffee Grains
1/2 C. Plain (or Vanilla) Yogurt
1 Egg
1/2 C.  Semisweet Chocolate Chips
1/2 C. Milk Chocolate Chunks
*Extra 1/2 C. Milk Chocolate for drizzle

Recipe continued after the break...
 

Sunday, September 11, 2011

Pesche - Italian Wedding Cookies


Last weekend, I was a bridesmaid in a wedding that joined two wonderful Italian families. From the bridal shower to the rehearsal dinner, to the wedding itself - Italian culinary fare & culture was ever present & ever delicious.

Being an Italian myself, I was familiar with basically all of it - chicken parmigiana, ziti, fish, risotto, eclairs, macaroons, sfogliatelle. But there was one wonderful cookie that I had never had before.  Pesche (Italian for "peaches"). And boy, did I fall hard in amore with this cookie.

It is an Italian cookie typically made for special occasions, weddings in particular, because of its complex & time consuming nature. They are named peaches, because they resemble the fruit when complete. The cookie actually consists of two individual cookies that have been "glued" together with a chocolate filling, and then dipped in peach brandy and sugar.


After much research, I have found that the exact recipe and filling for this cookie varies greatly. Some people fill this cookie with peach preserves or plum jam, but you know I had to go the chocolate route.

Although time consuming, each step in this process is very simple and overall, the ingredients are not complex. They are worth the work (and the calories).

Recipe & more pictures after the break...

Monday, September 5, 2011

Oh-So-Fudgey Chocolate Crinkle Cookies


This is by far my favorite, all chocolate, fudgey, soft, I-could-eat-a-million-of-these-but-I'll-try-not-to cookie. Eating a chocolate crinkle goes a little something like this: Bite. Close eyes. Breathe deeply through your nose.  Moan a long "Mmmmmmm." Chew slowly to savor every moment. Open eyes. Repeat. It's a natural reaction, really. You'll see.

And as today, Labor Day, the unofficial final day of summer comes to a close, this is the perfect recipe to share.   It represents exactly how I would describe this summer: decadent.

I was fortunate enough to spend more time than usual relaxing with family and friends, soak up lots of sun (although you could never tell from my translucent skin tone), attend several gorgeous weddings, rekindle old loves (for writing and baking, baking, baking), and of course, eat amazing meals, but more importantly, amazing desserts. For all of these things, I am so grateful...and the fun isn't about to stop! There are so many things lined up for this fall that I can't wait to share with all of you & celebrate with new recipes.

Recipe after the break...

Sunday, August 28, 2011

Buon compleanno, mi Nonno!


Friday night was a very special one. My family and I all gathered in celebration of my Nonno's 80th birthday. Granted his birthday is not until November, but he is incredibly hard to surprise, and is heading back to Florida very soon. The conditions were perfect to surprise him in August.

My grandfather is someone that I truly admire and have always looked up to. He puts family first in a quiet yet strong & dedicated way. He is responsible for bringing over many of his siblings from Italy to America, being an incredibly hard worker, a great friend, a father of five, an uncle to an uncountable number of nephews and nieces, a grandfather to nine, and a great grandfather to three.  He does without asking, cares unconditionally and never looks for a thank you.

Joker, Dancer, Fighter, Friend, Rock. He is all of these things. I feel so blessed to have him in my life and so honored to call him my Nonno. Thank you for always being proud of all of us, supporting us through good and bad, and for your constant loyalty and love.

In true Italian fashion, we celebrated with wine, dancing, food and desserts. My grandfather is a fisherman, so of course, we had to implement that in to the party - showcasing many photos of him holding great catches of the years, a cake adorned with a photo of him cruising in his boat, fish sugar cookies as favors, sea glass & shell center pieces and more.

Here's a quick look at some of the delectable treats provided by family, friends and cuginos:


Mass Production of Fishy Sugar Cookies (Bagged & given as favors)

More photos after the break...

Monday, August 22, 2011

Orange Juice Cookies


Do you know what I saw the other day when I was driving? A tree whose leaves were already changing colors. The nerve! How did this tree not know that it isn't even labor day yet?  Although I love fall, that impatient season really needs to back up off my summer. Granted, fall lasts just about as long as spring does in New England, and that would be about 5 minutes. I get it, it wants it's time to shine, but I ask with all sincerity, in fact I'm pleading, please can you just wait?!

In a desperate attempt to hold on to summer as long as I can, I am sharing with you one of my favorite cookies. Orange juice cookies are light, fluffy and remind me so much of summer because of their subtle citrus flavor. One batch makes an unnecessary amount of cookies. The Angel on your shoulder will tell you to share them - the devil will whine, "But they're sooo good!"

My grandmother makes these cookies all the time - but bakes them longer until they're a little more dry & hard, like a biscotti. My mother makes her version softer, fluffier, and edible without the need for a dunking partner.

Recipe after the break....

Sunday, August 21, 2011

Lots-of-Birthdays Weekend

This weekend was full of birthdays! Two of the most adorable children I know had birthdays. My distant "cousin," Marissa, and my second cousin, Chase, both celebrated their birthdays this weekend with family parties filled with food, fun & laughs. Of course, I had to contribute to the celebrations the best way I know how - with sugar.

I baked these chocolate cupcakes with chocolate buttercream frosting for little Miss Marissa's birthday, which as you can tell, was Dora the Explorer themed. I made bright wildflowers out of laffy taffy & Starbust - the perfect compliment to the rest of the cupcakes that were adorned with "Let's Fiesta" Doras.


Last week, I had promised Chase that I would make him dinosaur cookies for his birthday. Although a day late, I made good on the promise and hand delivered these to him today. He loved them -and of course, ate them head first. I told him the blue ones were T-Rexes and the green ones....I couldn't identify - I just knew they were some type of dinosaur. He seemed okay with that.

I used the sugar cookie recipe & royal icing that I had previously posted. See it here.


Happy Birthday Marissa & Chase! Wishing you the absolute best for a great year filled with love & sweets. If you ever find yourself without, you know where to find me.

Monday, August 15, 2011

Rice Krispy Treats - A Marshmallow Mess

Some people might say that I had a deprived childhood because I never made Rice Krispy Treats as a kid. After making them this week, I would like to personally thank my family for never subjecting me to this horror during my adolescence.

Although "easy" to make, these things are a mess - a sticky struggle. The best part about making them was watching the marshmallows expand and come close to the point of explosion in the microwave.

I will say, that with a little bit of doctoring, these things have the potential to be delicious. On their own, they're pretty bland. Next time (if there is a next time) I would probably add chocolate chips, or add some almond extract in to the marshmallow mixture, and there definitely needs to be a drizzle...butterscotch, chocolate...or...nutella (yum.). In fact, I had to break in to my secret nutella stash (yes, I have one) to frost a few of these and give them some flavor.


Here's the recipe:

Rice Krispy Treats

3 tbsp. Margarine
1 bag regular sized marshmallows
6 cups Rice Krispies Cereal

In a microwave-safe bowl, heat butter & marshmallows on high for 2 minutes. Stir. Microwave again for another minute. Stir until Smooth.

Add Rice Krispies to the marshmallow mix and stir until cereal is well coated. Pour into a greased 13 x 9" pan and press down evenly throughout the pan. Allow to cool. Cut into bars or shapes. Best if served the same day. Wrap in plastic wrap tightly to store.

Here's some discoveries I made along the way:

1. Make sure you use a bowl with high sides when microwaving your marshmallows. They are going to expand, expand, expand and if they don't have enough room to grow, they will fall out of the bowl.

2. The mixture will be hot, hot, hot! Make sure you have a strong spoon to mix with, and mix well before trying to transfer in to the bowl. You will need to use your hands to help pour and spread the mix into the pan because it is going to be a cement-like ball.

3. Have the Rice Krispies pre-measured & ready to pour in to your marshmallow mixture. The mixture goes from silky to the consistency of dry rubber cement in seconds, so you need to work quickly.

4. Nutella makes everything delicious. Even rice krispy treats.


Sunday, August 7, 2011

The Candy Warehouse

I am in love with this website!

They sell every type of candy imaginable and I want them all! They specialize in old-time classics & hard to find confections.

Check it Out!: The Candy Warehouse


Here is my Candy Warehouse Wishlist:


Black Cow - Chocolate & Caramel Bars
$24.00/Box of 24 Bars

Chocolate & Caramel - What's not to love?
Sounds DELICIOUS!


Image Courtesy of CandyWarehouse.com


McCraw's Giant Taffy Candy Slabs
$12.00/24 Taffy Candy Slabs

Who doesn't enjoy a nice piece of taffy?


Image Courtesy of CandyWarehouse.com


Old Fashioned Creme Drops
$48.00/Box of 24 10 ounce bags

These are my absolute favorite "vintage" candy! My Aunt Grace would always buy these for us sporadically throughout the year and surprise us with them. So decadently sweet!


Image Courtesy of CandyWarehouse.com


Mountain Candy Bars
$24.00/24 Count Box

I've never had these, but I definitely feel that I need to! A layer of chocolate & chopped peanuts covering a silky inner layer of flavored cream. Cherry, Original, Peanut Butter. Next flavor in the line could just well be heaven.


Image Courtesy of CandyWarehouse.com


Tuesday, August 2, 2011

Classic Italian Pizzelles


Like any good Italian, my mother volunteered to make pizzelles for a get together with friends this weekend. Unlike traditional pizzelles, my mother likes to make them a little thicker, so they're a little less crunchy and a lot more reminiscent of what I like to call, a comfort cookie.

I've always loved pizzelles. They're a very simple cookie, really - flour, sugar, eggs, margarine, baking powder, anise. Your textbook ingredients for your typical-old-baked-good. But pizzelles are special - each one is like a snowflake when you make them from scratch. Each holds a slightly different shape than the last, the patterns seeming to form a unique design on each individual cookie even though they all came from the same press. Yes, they're undoubtedly the snowflakes of Italian cookies.


My mother bought this pizzelle maker in the late 1970s and has been using it, with love, ever since. It is still packed away after every use in it's original blue & white (now yellow with the years) box. And, in the box, goes the key to the power of the pizzelle - the original recipe that came with the machine:


Here's the recipe again for easy reading:

Pizzelles

6 eggs
3 1/2 C. of Flour
1 1/2 C. Sugar
1 C. Margarine
4 tsp. Baking Powder
2 tbsp. Anise extract

Beat eggs, adding sugar gradually. Beat until smooth. Add cooled melted margarine and anise. Sift flour and baking powder and add to egg mixture. Dough will be sticky enough to be dropped by spoon.

Spray the pizzelle maker with butter spray. Drop dough by the tablespoon in to the center of each cookie plate. Close for a minute & allow to cook. Next, check on your pizzelle! If you want a more crispy cookie, leave in the machine for another thirty seconds - If you prefer yours a little softer, remove after a minute. Cookie will be lightly golden.

Allow to cool & store in an airtight container.

Don't have a pizzelle maker? Here's a modern version by Cuisinart:


Cuisinart WM-PZ2 Pizzelle Maker
$36 - Amazon.com


Photo Courtesy of Amazon.com


Amerete questo pizzelle! (You will love this pizzelle!)

Sunday, July 31, 2011

"Fishy" Sugar Cookies & Royal Icing Recipe


I was asked to make sugar cookies for a family event coming up in August. I decided to do a dry-run today & test out the cookie recipe I had chosen & the royal icing, since I had never worked with it before...

...and it was so easy! I had an absolute blast decorating these! They were just fun, fun, fun from start to finish. Royal icing adds a professional touch to your cookies, and honestly, it's very quick to make & easy to work with!

Here is a very simple recipe for royal icing - use it to top your favorite sugar cookie recipe!

Royal Icing

3 C. Confectionery Sugar
1/4 tsp. Cream of Tartar
3 egg whites, beaten

Mix together confectionery sugar and cream of tartar. Using an electric mixer, beat in 3 egg whites for a few minutes until fully mixed.

Immediately add desired food coloring & put royal icing in to squeeze bottles or piping bags to decorate with. The icing hardens quickly, so you need to use the icing immediately after you make it. I used Wilton Squeeze Bottles which worked fantastically. I would suggest using squeeze bottles to "flood" the cookie & a piping bag with a small tip to add details to the cookies.

Click on these links from The Brown Eyed Baker for a great sugar cookie recipe & royal icing decorating tips.

Oh yeah, click here to get the adorable candy eyes!

Thursday, July 28, 2011

Little Heel, Major Deal

Ladies & Gentlemen, I'd like to introduce you to my inner Bargainista.

I set out on a mission tonight to find shoes to wear with a red dress I got a great deal on ($16 - originally $90) to a friends' wedding. I was willing to spend $50 on the shoes - planning that they would be something that I could wear with this particular dress only and that the majority of their life would be spent in a box collecting dust & praying for the day I decided to break out said red dress again. I just wanted to find something that went with the dress that I could stand wearing during the course of the ceremony, full well knowing that once I hit the reception hall, I would be breaking out a pair of emergency flip-flops from my purse and my heels would be gone & forgotten - left on my chair at my designated table...watching my purse for me while I kept the dance floor company.

But little did I know what DSW had in store for me this evening. As a general bargainista rule, you never look at anything full-price....first. You only return to the full-price racks if you are desperate and the event you need to go to is less than six hours away. I, at two weeks from the wedding, was not that desperate and trotted immediately over to the clearance section. But being that one, I'm cheap, and two, I have a size eleven foot, I was not all that hopeful that the clearance section would be holding any worthwhile.

Yet there they were - Chinese Laundry nude strappy sandals. Nice, solid heel - not too high. Stylish, versatile and surprisingly comfortable. Perfect for the dress and something I could actually wear more than once. Now, let me tell you about the deal.


The shoes were originally $59.00.
They were priced at $39.94 on the clearance rack.
As part of the sale they were having, I got an additional 40% off the shoes since they were in clearance - bringing their price to $23.96.
Then, I signed up for the DSW Rewards Program, scoring me another $5.00 off since my birthday was just two weeks ago.

This brought the total price of the shoes to $18.96, meaning a 68% savings for me.

Score one for the Bargainista. ;)

Sunday, July 17, 2011

Ooey-Gooey Cinnamon Sugar-y Banana Muffins


When I got home today, there were two sad overly-ripe bananas staring at me from the otherwise empty fruit basket on my counter. I had gone away for the weekend, and abandoned this leftover fruit unknowingly. But although I had neglected them over the past few days, I made sure these bananas were used to their fullest potential - I allowed them to be reincarnated in delectable-muffin form. And because I was craving something extra sweet, I added a little sugar & spice to the mix.

The result was an incredibly moist, ooey, gooey muffin with multitudes of layers & flavors.

Perfect for a quick grab & go breakfast - or in my case, a mid-night snack to satiate my sweet tooth as I watch Sunday night guilty-pleasure reruns on E!

Ooey-Gooey Cinnamon Sugar-y Banana Muffins

2 C. Flour
1/4 C. Sugar
1 tbsp. Baking Powder
1/2 tsp. Salt
1 C. Milk
1 egg
1/2 tsp. Vanilla
1/3 C. Vegetable Oil
3/4 C. Mashed Banana (about 2 medium ripe bananas)

Topping:
3/4 C. Brown Sugar
1 tbsp. Cinnamon

Yields 12 Muffins

Preheat Oven to 400 degrees Fahrenheit.

Sift flour, sugar, baking powder & salt into a medium bowl; make a divot in the center of the dry ingredients.

Mash bananas. Mix milk, egg, oil, vanilla and bananas together. Pour mixture into dry ingredients. Mix until all ingredients are evenly combined.

Put 12 liners in a cupcake or muffin baking tin. Spoon batter into tins 1/4 of the way full. Mix cinnamon & brown sugar together in a bowl. Spoon a little of the cinnamon sugar mix into each muffin cup. Pour the rest of the batter evenly into the muffin cups. Top each muffin with the rest of the cinnamon sugar mix.

Bake for 15-18 minutes or until a toothpick inserted in the muffin comes out clean. Let cool for about 10 minutes. Best when warm - Microwave for ten seconds if enjoying the cupcakes a few hours after baking.

Enjoy the ooey-gooey!


Friday, July 15, 2011

Calories Don't Count on Your Birthday


I have a confession to make.

Yes, I am one of those people that LOVES to celebrate birthdays - not just my own, but my family's, friends', peers. If there's a birthday, I have to know about it. Birthdays to me are incredibly special & significant. It's a time where you can look back on the last year and see how you've grown, how life is changed, reflect on lessons you've learned and appreciate the good that has resulted from the last year's worth of experiences.

My birthday was this week and I must say - it is the only thing I still look forward to with childlike giddiness & joy. I can't wait to be surrounded by the people that I care most about & to celebrate in my favorite way possible - over a lovely piece of cake.

And for my birthday, there is only one kind that is acceptable: white cake with white frosting and flowers - lots of flowers.

My bakery of choice? Fratelli's Pastry Shop in Quincy, MA. They crafted the beautiful cake above!

Let me tell you - it was amazing - moist, flavorful, just the right amount of frosting & sinfully sweet. If I was issued only one meal for the rest of my life, it might just have to be this cake.

Monday, July 11, 2011

A Bridal Shower in Paris


One of the girls that I work with is getting married this summer & today we threw her a bridal shower at our office. She is going to Paris for her honeymoon so the whole shower was Parisian themed! Everything from the napkins to the desserts screamed Paris - and every bit of it was a pleasure to the eyes & the tummy!

Everyone in our department (as you can tell, we work in the Creative Department) pitched in and contributed something for this great event. Below is just a small sampling of the lovely treats that were there. I, of course, made cupcakes with Parisian toppers. I was so impressed & inspired by the talents of my co workers. Martha Stewart, eat your heart out!


Raspberry Trifle

Petit Fours


Creme Brulee

Vintage Luggage (packed with travel tips!)

Gifts

Lovely Centerpieces

Croissants
(note the adorable note cards - also designed by our Creative team!)

Chocolate Croissants

Cheese & Fruit Tray

Strawberry Cake Pops


Congratulations, Shawna! - Let's hope the desserts in Paris can stand up to the talents of your coworkers! :)